We have decided to create the most comprehensive guide on how to start a WordPress blog without any technical knowledge. If you need best unique ideas to discover website name check cheap domain name generators tool for business website.
The process is easy to follow:
What do You Need to Start a WordPress Blog?
There are three things you need to start a WordPress blog:
- A domain name idea (this will be the name of your blog)
- A web hosting account (this is where your website lives on the internet)
- Your attention for 30 minutes.
Yes, you read it right. You can start a blog from scratch in less than 30 minutes, and we will walk you through the whole process. But first you have to get domain and hosting. For that you can go with DomainRacer, domain and hosting providers. If you’re planning to migrate WordPress to new host, it’s important to understand the steps involved in starting a blog on WordPress, as they can help ensure a smooth and successful migration process.
Let’s start step by step,
In this article, we will cover:
- How to Register a Domain Name and Hosting?
- How to Install WordPress?
- How to Change Your Theme?
- How to Write Your First Blog Post?
Ready? Let’s get started.
Step 1. How to register a domain name and hosting?
For 95% of users, it makes more sense to use WordPress.org also known as self-hosted WordPress. Why? Because it is free to use, you can install plugins, customize your site design, and most importantly make money from your site without any restrictions
Now you have probably heard that WordPress is free. If you want to sells and manages website names pick best domain registrar world’s biggest company.
You might be wondering why it is free. What’s the catch?
There’s no catch. It’s free because you have to do the setup and host it yourself.
In other words, you need a domain name and web hosting.
A domain name is what people type to get to your website. It’s your website’s address on the internet. Think google.com.
Web hosting is where your website lives. It’s your website’s house on the internet. Every website needs web hosting.
Here is the DomainRacer, domain and hosting provider you can go with.
That’s a lot for beginners who are just starting out. You can purchase your domain + hosting from there!!
Step 2. How to Install WordPress?
It’s not necessary to manually install WordPress as it can be quickly installed via Quick Install from cPanel, however, if you are having trouble with this method, here we cover the steps needed to install WordPress manually.
Step 1: Download WordPress
Download the WordPress package to your local computer from http://wordpress.org/download/.
Unzip the downloaded file to a folder on your local computer.
Step 2: Upload WordPress to Hosting Account
There are three available options for uploading WordPress to a hosting account.
– Upload via FTP
– Upload via File Manager
– Upload via SSH
Step 3: Create MySQL Database and User
WordPress stores its information in a database. Therefore, a database will need to be created.
Log into CPanel, In the Databases section, click the MySQL Database Wizard icon.
- a) Create A Database, enter the database name and click Next Step.
- b) Create Database Users, enter the database user name and password and click Create User.
- c) Add User to the Database, click the All Privileges checkbox and click Next Step.
- d) Complete the task, make note of the database name, username and password.
Step 4: Configure wp-config.php
The wp-config-sample.php file contains the database information and tells the WordPress application which database to pull information from. This step must be completed to ensure the correct database information is associated with the WordPress installation.
The wp-config-sample.php file can be found in File Manager in the folder where WordPress is installed. To modify the file:
– Log into cPanel, In the Files section, click the File Manager icon.
– In the pop-up box, select Web Root and check the box for Show Hidden Files (dotfiles), then click Go.
– From the left navigation menu in File Manager, click public_html to expand the folder.
– Click the folder containing the WordPress installation.
– On the right side of the File Manager screen, locate the wp-config-sample.php file.
– Right click on the file, select Rename and change the name of the file to wp-config.php. Click the Rename File button.
– Right-click on the wp-config.php file and select Code Edit. When the file opens, look for the following information:
define(‘DB_NAME’, ‘database_name_here’);
/** MySQL database username */
define(‘DB_USER’, ‘username_here’);
/** MySQL database password */
define(‘DB_PASSWORD’, ‘password_here’);
- Replace database_name_here with the name of the database you created
- Replace username_here with the username of the database you created.
- Replace password_here with the password of the database that you created.
– When done editing, click the Save Changes button, then close the file.
Step 5: Run the Installation
Open a new browser window and go to the installation page to run the installation script. Depending on where you installed the script, you will find it at either of the following URLs:
http://yourdomain.com/wp-admin/install.php
http://yourdomain.com/blog/wp-admin/install.php
NOTE: Be sure to replace yourdomain.com in the example above with your actual domain name.
You should now see a welcome page that says “Welcome to WordPress installation process!”
Step 6: Complete the Installation
On this page, fill in the fields for:
– Site Name
– Username
– Password (needs to be entered twice)
– Email address (login information will be sent to this email address)
– Select whether or not to have the search engines index the site
Click Install Now, and you should be taken to the final screen, showing the following message:
Success! WordPress has been installed.
https://www.youtube.com/watch?v=sOA7HA3lVfA
Step 3. How to Change Your Theme?
The visual appearance of your WordPress blog is controlled by themes. When you first visit your blog, it will look something like this:
Customizing the look and feel of your blog is by far one of the most exciting and rewarding part in the journey of creating your WordPress site.
There are thousands of pre-made WordPress themes that you can install on your site. Some of them are free, while others are paid.
You can change your theme by going to your WordPress dashboard and clicking on Appearance » Themes.
Go ahead and click on the Add New button.
On the next screen, you will able to search from the 3500+ free WordPress themes that are available in the official WordPress.org themes directory. You can sort by popular, latest, featured, as well as other feature filters
When you have found the theme that you like, simply bring your mouse on it, and it will show the Install button. Click on it and wait for the theme to be installed. After that, the install button will be replaced with an Activate button. You need to click on it to Activate the theme.
Once you have installed your theme, you can customize it by clicking on the Customize link under the Appearance menu.
Once you have selected your WordPress theme, you are now ready to create your first blog post.
Step 4. How to Write Your First Blog Post?
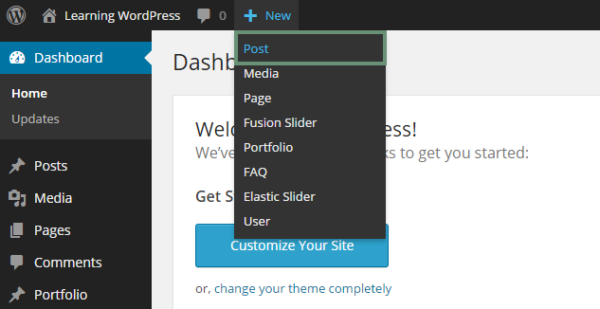
To write your first blog post, click on the Posts » Add New menu in your WordPress dashboard.
You will see an editor area where you can write your first blog post.
Once you’re done writing, go ahead and click on the Publish button on the right to publish your first blog post to the world.
On the posts screen, you will notice several other sections such as Categories and Tags. You can use these to organize your blog posts. To utilize all the features on the posts screen.
Author